Decide your extract before you decide your loot, bring only a kit you would not mind losing, and run the same five questions after every death. Those three habits are the whole curriculum for the first ten raids, and they cover the three moments that actually decide whether early Tarkov feels random or learnable: what you carry in, what you do once you spawn, and what you do with a death after it happens. Nothing here is an ammo value, a trader price or an armour class, because those move with every patch while the routine does not. (Written 23 August 2026, updated 13 September 2026, against patch 1.1.0.0 of 3 August 2026 and Season 1: KORD BREACH.)
What to bring, and how much to risk
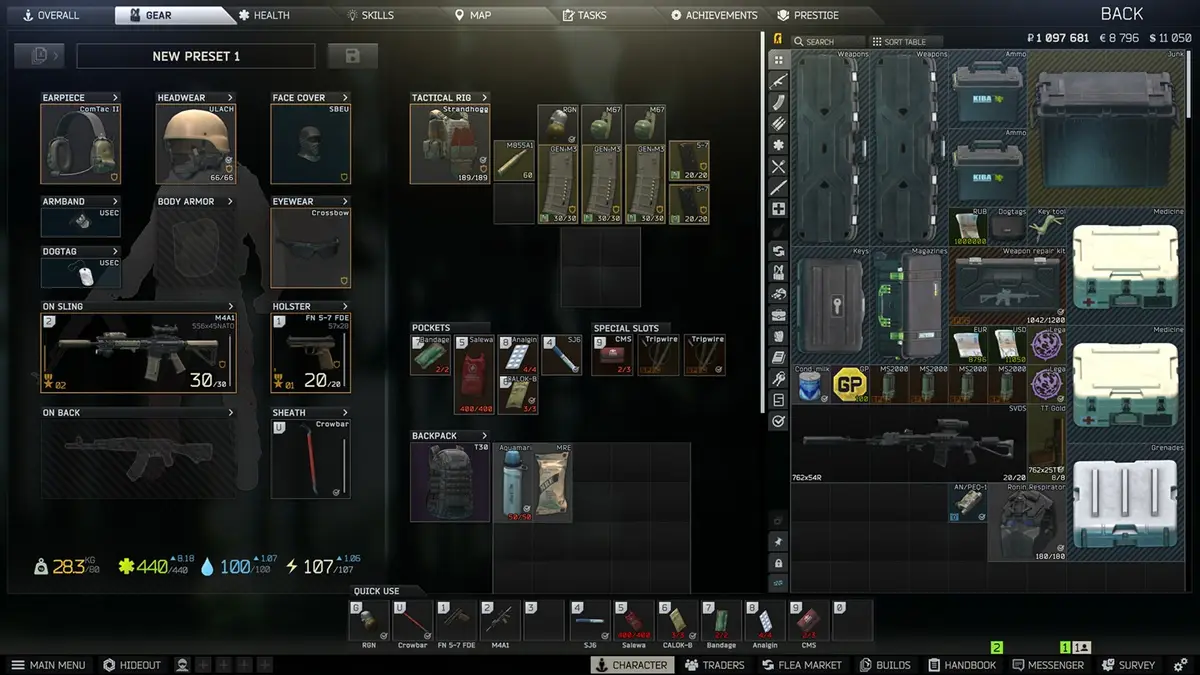
Every gear question a new player asks — is this armour good enough, should I bring the better gun — is really “what is this raid for,” asked backwards. Answer that first and the kit picks itself. Fill in your own prices; 1.1.0.0 raised trader buy prices by roughly 25%, cut what traders pay you for items by roughly 20%, and raised the Flea Market fee from 3% to 5%, so any rouble figure printed here would already be wrong. The relationships below hold regardless of what the market is doing.
| Kit tier | Raid it’s for | Acceptable outcome | Move up when |
|---|---|---|---|
| Naked-ish | Map learning, extract practice | Dying costs nothing | You know the route and want loot |
| Scav-tier | Loot runs, low-traffic maps | Losing ten in a row is survivable | Loot rooms need a fight to reach |
| Working kit | Most tasks, most raids | Losing three in a row is survivable | A task repeatedly fails on gear, not skill |
| Task kit | A specific task you keep failing | Losing one hurts but doesn’t stop you | Rarely — this is the ceiling for most players |
| Hoarded kit | Almost nothing | Losing it changes how you play for a week | Never — gear rots in the stash |
The hoarded tier is on the table because it’s where money actually disappears: gear kept for the perfect moment either gets lost in an ordinary raid or is still sitting in the stash at wipe. The correct amount of hoarded gear for a new player is roughly none.
Before every queue, ask one question: if I lose this kit three times in a row, what happens? If the answer is “nothing much,” you’re correctly sized or could go up a tier. If it’s “I’d need a few Scav runs to recover,” that’s correct for a task raid but too expensive for a casual one. If it’s “I’d have to stop and grind money back,” drop a tier — you’re one bad session from playing scared, and playing scared costs more than the kit did. If it’s “I’d consider quitting for the night,” drop two tiers immediately. Losses in this game arrive in clusters, and a kit you can only afford to lose once is not a kit you can afford. Better ammo is a real force multiplier here too, but its numbers moved in 1.1.0 and this page isn’t quoting values that haven’t been verified since.
Gear only earns you the raid in three narrow cases: a task forces contact through a contested area, you’re consistently losing fights you should win positionally (not fights you were ambushed in — that’s a map problem, not a gear problem), or the loot ceiling justifies the exposure and you have somewhere to put it. Feeling behind, or wanting the raid to feel serious, is not one of them. A cheap kit also removes hesitation, and players carrying gear they’re afraid to lose take worse fights and extract later — so ten low-exposure raids will usually out-earn three high-exposure ones while you’re still learning the maps.
Selling your own offers on the Flea Market only opens at PMC level 15, so early on your money moves through traders, not the market — one more reason the cheap-kit tiers above matter more than market prices do this early.
Before the raid loads
With a kit picked, do these in order. Each takes under a minute and removes a specific way the raid ends badly.
- Check the map screen and pick two extracts — a primary and a backup on the opposite side of the map. If you can only name one, you have no plan; you have a hope.
- Fill the secure container first. Contents of the secure container are retained on death, so meds, a spare key and money go there before anything touches the backpack.
- Check whether any active task is on this map. If yes, that’s the raid’s objective. If no, the objective is the extract, and that’s a valid objective.
- Water and food in the bag, not just the stash. Hydration and energy drain across the raid, and a new player is usually in-raid longer than a veteran.
Once you are in
The first minute after spawn decides more than the next thirty. New players make the same three mistakes, and all three are correctable by habit rather than skill.
- Do not sprint from spawn. Sprint noise is the loudest thing you produce, and the first two minutes are when other players are closest to their own spawns. Walk, listen, then move.
- Move to a landmark before looting. Knowing where you are is worth more than the contents of the first container you pass. If you can’t name your position, don’t open a bag.
- When you hear a gunfight, go the other way. Third-partying works because both parties are already damaged. It’s also how a raid ends while you’re still learning which direction sound comes from.
- If you take a hit, stop and treat it before repositioning. Bleeding costs more health over thirty seconds than the shot itself did.
- If you get lost, pick a direction and commit. Wandering burns the raid timer, and running out of time counts as a death for everything not in the secure container.
Deciding when to leave
This is the branch new players get wrong most often, because leaving early feels like wasting a raid. It isn’t. Use whichever trigger comes first.
- Your backpack is full → leave. Nothing you pick up now improves the run more than banking it.
- You completed the task you came for → leave, even with an empty bag. Task progress is the thing you can’t buy back.
- You’re below roughly half health with no meds left → leave. You can’t win the next fight and you know it.
- A quarter of the raid timer remains and you’re not near an extract → leave now — the walk is always longer than it looks.
- None of the above and you feel confident → keep looting, but re-check the timer every time you open a container.
After you die: five questions
Ask these in order, immediately, before queueing again. The early questions usually make the later ones unnecessary, and each has exactly one correction — the whole value of the exercise is matching cause to correction correctly rather than reaching for gear.
| Question | If the answer points here | The correction | Not the correction |
|---|---|---|---|
| Where was I, exactly? | Couldn’t name the location | Run orientation raids on that map with a throwaway kit | Buying better armour |
| Did I know a fight was possible there? | Surprised in a known hot area | Approach it differently, or stop approaching it | Playing faster to “get there first” |
| Was I moving, looting, or standing still? | Died while looting, or died standing still in the open | Loot in cover and loot less per stop; move between covers, never across them | A bigger backpack; better optics |
| What would have prevented it — position, patience or gear? | Be honest — gear is the answer far less often than it feels | Fix position or patience first | Reaching for gear by default |
| Was I still in the raid for a reason? | Objective was already done | Leave when the objective is done | Anything else at all |
Do this once, in sixty seconds, right after the raid — a review that takes ten minutes gets skipped after the third death, and a habit you skip teaches nothing. It’s also never about whether the death was fair; it’s whether it’s repeatable, because repeatable deaths are the only useful kind.
Once a week, look at the whole set of five-question answers together rather than one at a time. If most deaths share a map, that’s a map problem — deliberate learning raids fix it, not more raids in general. If most deaths share a phase of the raid (early, mid, extract), that’s a timing habit, usually extracting too late. If most deaths share an activity — always while looting, always while pushing — that activity needs a rule. If deaths are genuinely scattered, you’re probably fine and just playing a game where people die. And if the same task appears in three or more of the deaths, the task is the problem, not you — run it with a different route or a different time of raid.
Money lost to a death and money lost to insurance are two different problems; the loss test above tells you whether the kit was sized right, but what you actually get back after a death — and whether it’s even available — is its own arithmetic, covered in the insurance loss math page rather than repeated here. One rule worth knowing before you rely on it: insurance only applies in PvP Zone and PvE Zone — it is disabled entirely in PvP Season, per the 1.1.0.0 patch notes.
What the first ten raids are actually for
Treat them as a survey, not as income. By raid ten you should be able to answer, without opening a map: where you spawned, which two extracts you used, and one landmark on each route between them. That’s the whole curriculum. Loot, gear and money follow from map knowledge and never lead it.
Dying is not a mistake in this game; dying without reviewing where you died is. And your survival rate in the first week tells you nothing about whether you’ll enjoy the game — everyone quoted in every “how do I get better” thread had the same first week.
If you’re on a seasonal character, the raids you spend learning are also raids spent against a deadline, and that’s worth pricing before you commit — the season time planner turns the deadline into a raid count. If your seasonal roll makes the learning phase harder than it should be, the modifier trade-off scorer is the page for deciding whether to keep the roll.
No extract names, no ammo numbers, no kill-screen breakdown
- No map-specific extract names, ammo, armour, or “best starting loadout.” Extract availability and item balance change with spawn and with patch, and a wrong number is worse than no number. Read extracts off the in-raid map screen; the correct starting loadout is the cheapest one you’ll actually take into a raid without hesitating.
- No rouble prices for any kit tier. 1.1.0.0 moved trader prices and the Flea Market fee. Price your own tiers in your own client.
- No recommended survival rate or kill-screen breakdown. Widely quoted survival figures aren’t measured on a comparable population, and a kill screen gives less information than people assume — reconstructing a fight from it is mostly invention.
Sources
- How to Play Guide for Escape from Tarkov — Escape from Tarkov Wiki — the wiki’s new-player guide, the basis for the pre-raid ordering and kit-cost framing above.
- Secure container — Escape from Tarkov Wiki — confirms secure container contents are retained on death.
- Health system — Escape from Tarkov Wiki — bleeding, hydration and energy mechanics behind the in-raid rules.
- Trading — Escape from Tarkov Wiki — confirms Flea Market offer creation unlocks at PMC level 15 (checked 13 September 2026).
- Insurance — Escape from Tarkov Wiki — why a lost kit is not the same as a refunded kit, behind the loss test.
- Patch 1.1.0.0 — Escape from Tarkov official news — the patch and season this page is written against, including the ~25%/~20% trader price changes, the Flea Market fee increase to 5%, and that insurance is disabled in PvP Season (checked 13 September 2026).